Links
.apk | iOS shortcut | Original doorbot | Previous post describing the server code updates of iOS shortcut
React Native Mobile App
Because this was my first mobile app, and it was a project I wanted to finish as quickly as possible, I had a few requirements I kept in mind when designing the app:
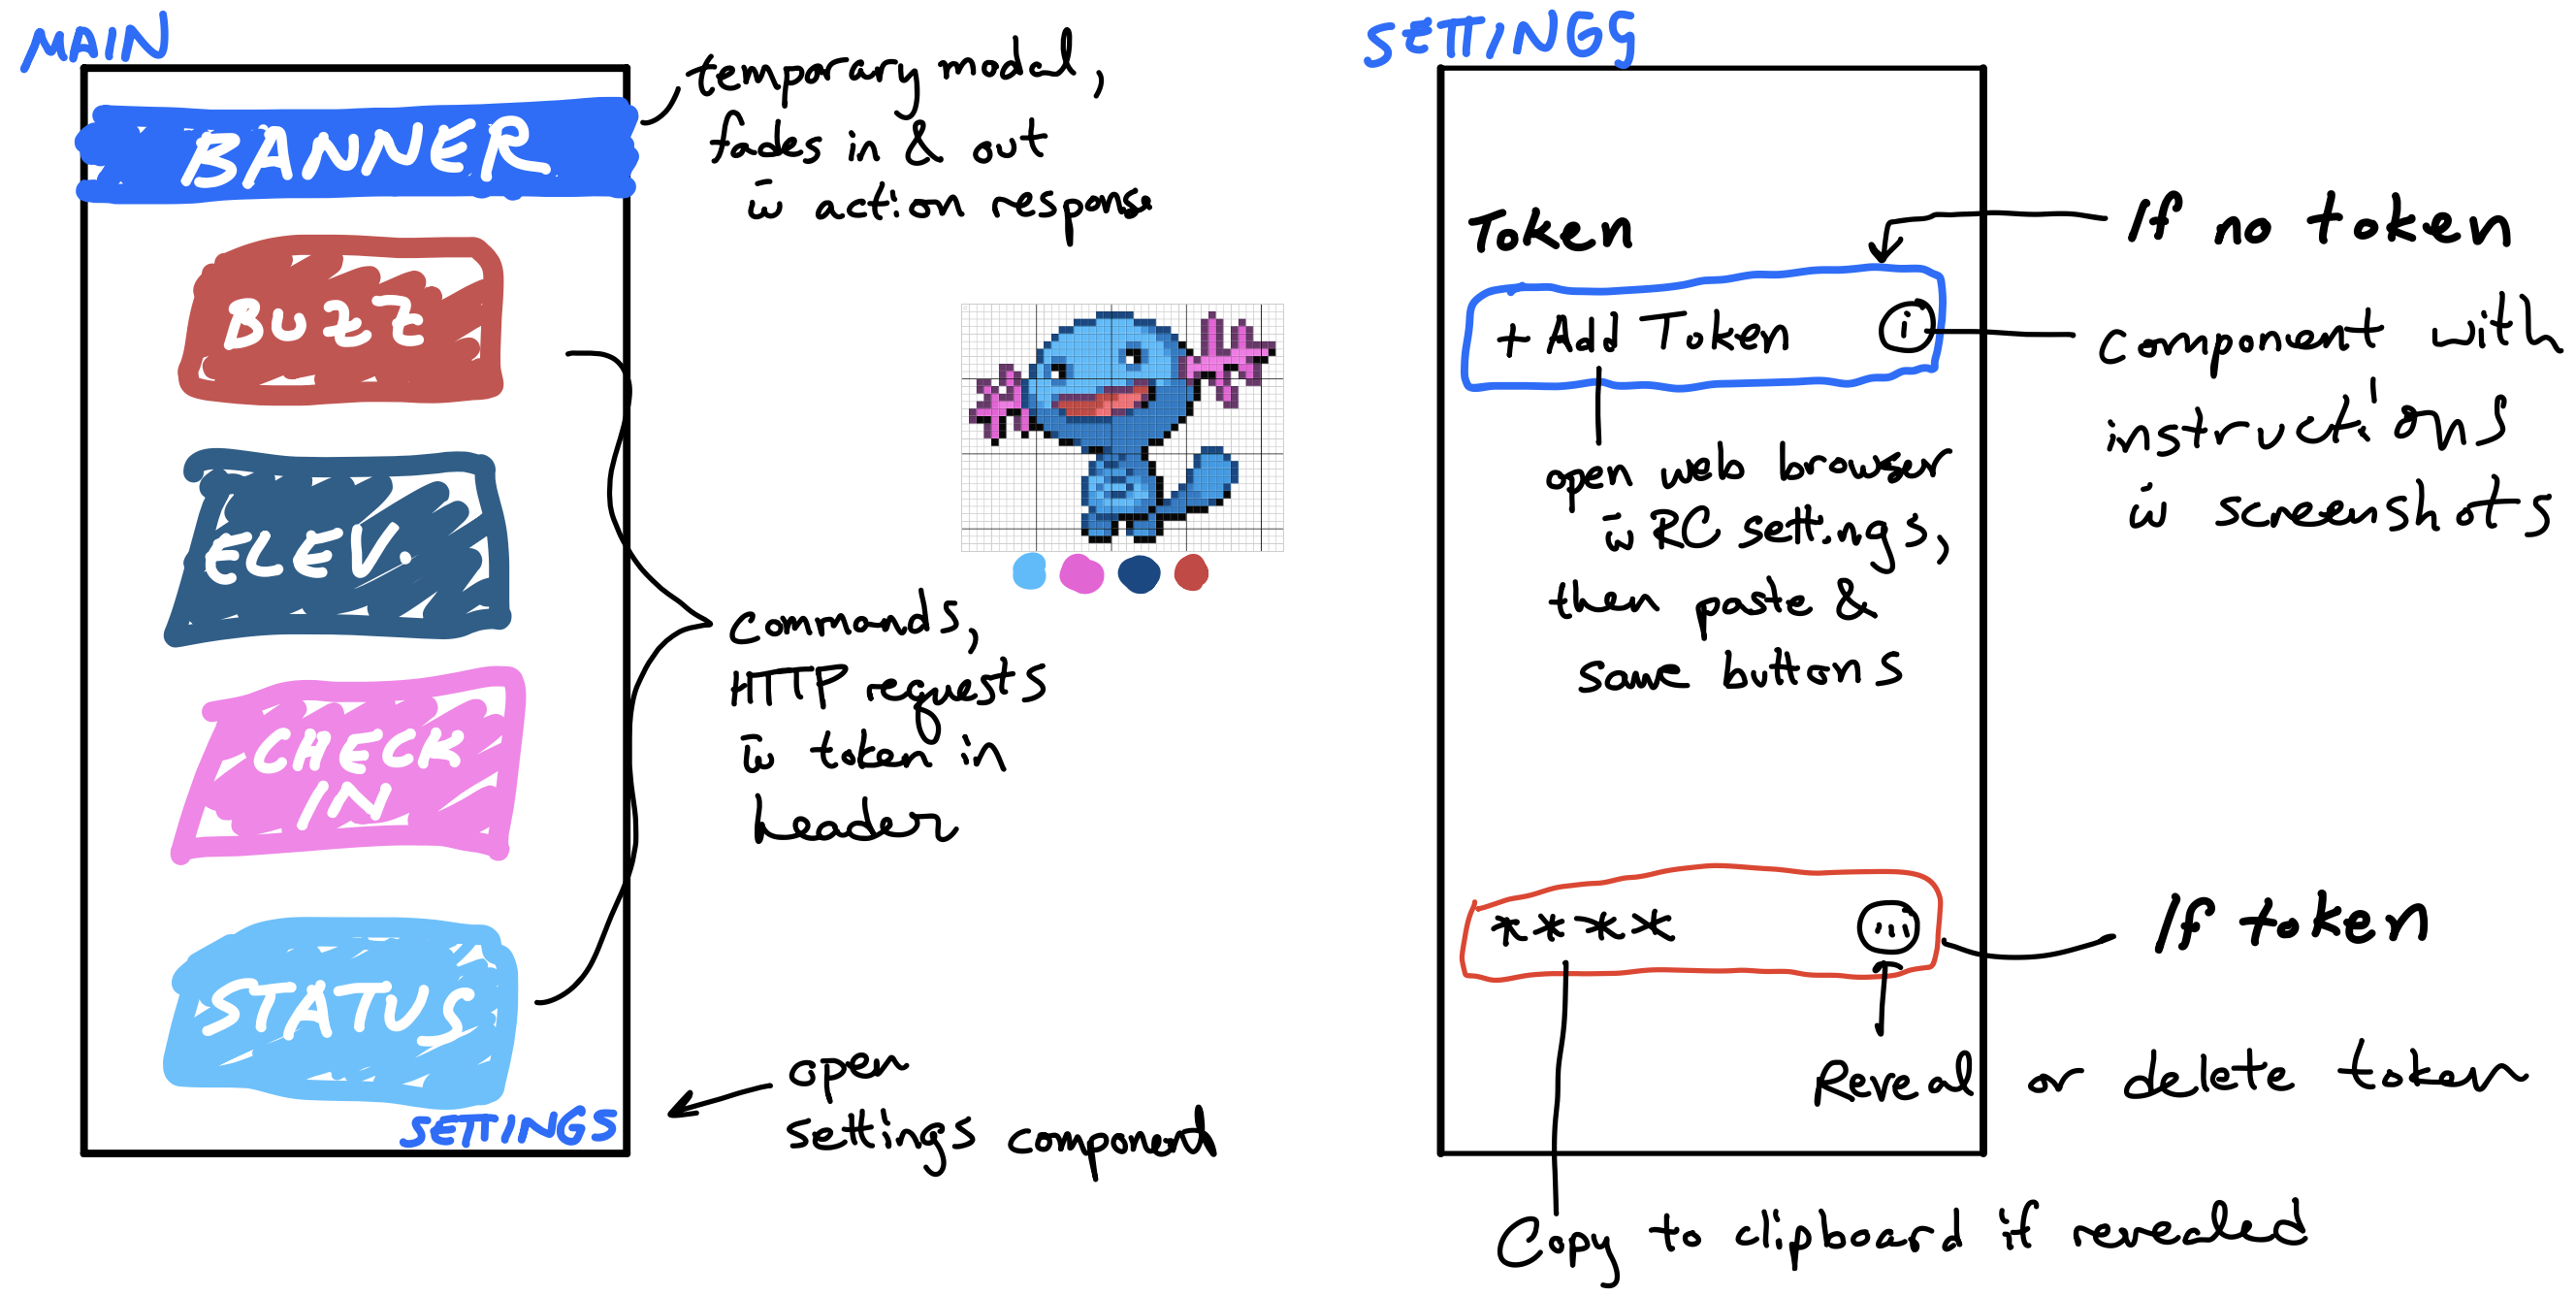
- extremely simple home page with the 4 buttons (buzz, elevator, status, hub check in) as the core
- storage of the token on device that can be retrieved and used by the app at any point
- settings page that walks users through (series of screenshots) getting the personal access token from their RC settings in a web browser - this should not really be opened after set up of the token
- pasting of the token into the settings, no keyboards/typing allowed
- copying of stored tokens onto the clipboard, if the user ever wants to access it
- Wooper color palette

I paired with Philip (SP2'24) on the getting the core functionality of the app up and running. Within a couple of hours, we had Expo running a simulation of our app with buttons that were able send API requests with a hardcoded token to the real doorbot (I apologize to anyone trying to use the elevators in the building that day)!! At some point, I was trying to get async storage of the token running, and Philip worked on getting a web browser open - I installed a package that somehow bricked our app. It was completely non-responsive and logging nothing, even when I rolled it back to an older version and played around with the packages/node modules. We were working together on VSCode Liveshare instead of separate git branches, so this was a very sad time. A lesson was learned that day.
New week, new create-react-native-app. Getting the main page back to its functioning state was trivial, and getting packages for async storage, web browsing, and clipboard installed went very smoothly somehow. Ben Simmons was not seen, no bricks encountered. Outside of styling and positioning of content, getting the settings page with screenshots on how to get a personal access token was pretty smooth. Opening of the RC settings site on the web browser was easy peasy. Storage and retrieval of the token was a little spicy. I was originally trying to retrive the token in the main app from async storage on mount with useEffect. The same was true in the Settings component but it also kept track of the token state, so the main page didn’t update the token when Settings updated and saved the token to async storage. Having the state of the token get set in the main app page, and passing token and setToken into the Settings as props was key.
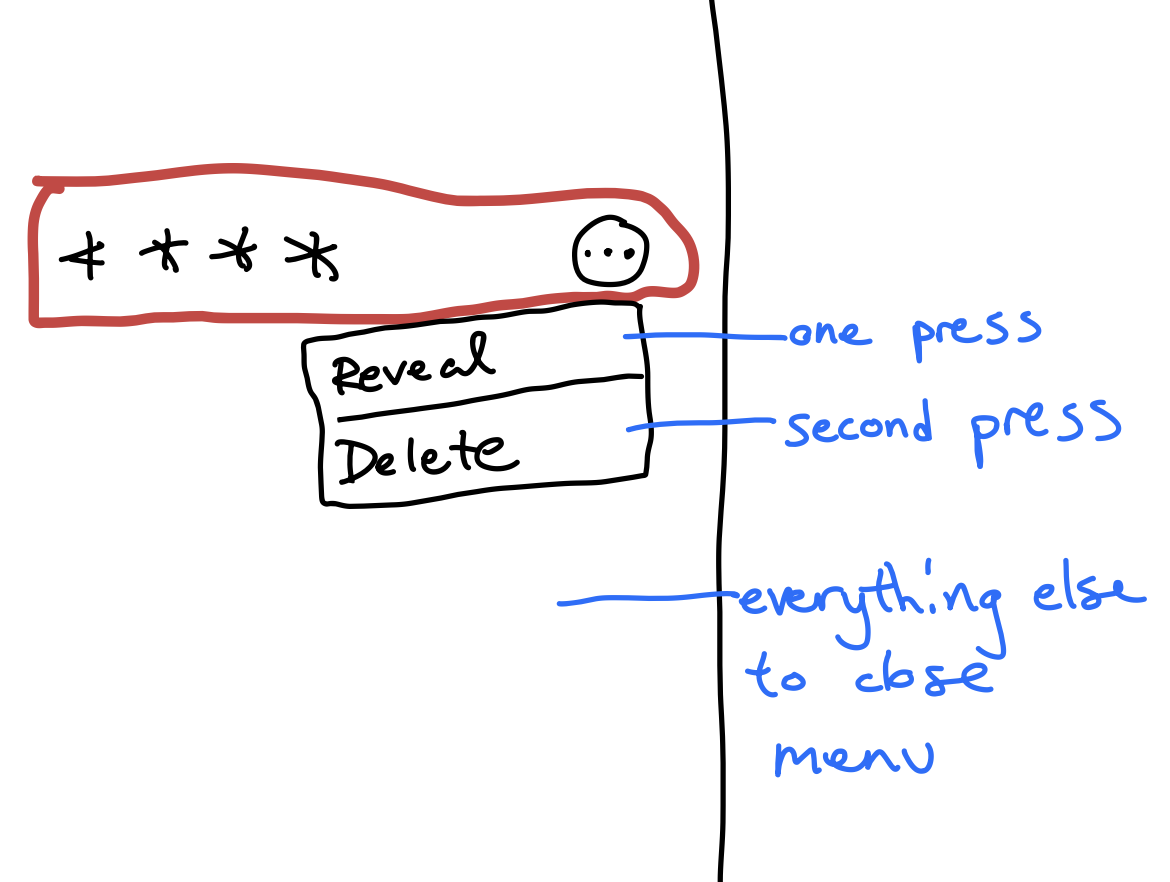
Having a drop down menu when you click the (…) button was a NIGHTMARE. You would think something like this is a regular component that is either native to React or a library you can use, but NO - they all either have this ugly scroll element at the bottom of the page, take up the width of the screen, or are stuck to the left of the button it’s anchored to and therefore render half off the screen. Maybe I should publish this dropdown menu component for people to download?
How to implemented dropdown menu from scratch:
- have a transparent touchable opacity that takes up the entire screen
- give this a
zIndexof 0 so it is above every other element, but will be below the dropdown menu buttons - you want to have a
handlePresson this that will close menu (setVisible(false)sorta thing) - that is, if the menu is open, pressing anywhere else will close the menu
- give this a
- have a view containing the touchable opacities (buttons for each option in the menu)
- I gave it an absolute position based on where the button is - perhaps I should have gotten the coordinates of this and adjust the relative position of this view based on that - that would make this a reusable component
- give this a
zIndexof 1 so they are above the overlay on the rest of the screen - each option button had a
handlePressthat called a function passing their button titles as an argument

Consistent sizing for any device
After getting all the functionality set up, I needed to change the styling of every page to fit any page. This involved importing Dimensions from react-native and getting the screen dimensions:
const windowWidth = Dimensions.get("window").width;
const windowHeight = Dimensions.get("window").height;
const baseUnit = Math.round(windowWidth / 100);
Set all other dimensions as a percentage of the width/height, or multiple of baseUnit for font size.
